How to Build an Armature for a Portrait Sculpture
If you're sculpting a portrait bust, you need a solid armature. A good armature supports the clay, keeps the sculpture stable, and allows you to work comfortably without the structure shifting while you sculpt.
The armature I’m going to show you is designed for a ¾ scale head sculpture, but it works very well for anything up to life-size. It’s simple, inexpensive, and very strong. Once you build it once, you’ll probably reuse the same design over and over again.
Below is the exact setup I use.
If you're new to working with clay, you may also want to read my guide on clay sculpting for beginners.
Materials You’ll Need
10 × 10 inch wooden board (base)
Two ½-inch wooden strips (used as legs)
½-inch floor flange
½ × 6 inch pipe nipple
¼-inch armature wire
Aluminum foil
Hose clamps
2–4 nuts and bolts
You don’t need anything fancy. These materials are easy to find at most hardware stores.
Step 1: Build the Base
Start by creating your base.
Take your 10 × 10 inch board and attach two wooden strips underneath to act as legs. These lift the board slightly off the table so you have space for the bolts that will hold the flange in place.
Secure the legs with screws or wood glue and screws. Once attached, your base should sit flat and feel stable on your work surface.
A sturdy base is important because portrait sculptures can become heavy as you add clay.
Step 2: Mount the Floor Flange
Next, mount the ½-inch floor flange to the center of the board.
Use 2 to 4 bolts to secure it. I personally use two bolts, which is usually strong enough to support the structure. If you want extra security, you can use all four holes in the flange.
Tighten the bolts well so the flange doesn’t shift while you're sculpting.
This flange will hold the vertical pipe that supports the armature.
Step 3: Attach the Pipe Nipple
Now take the ½ × 6 inch pipe nipple and screw it into the floor flange.
Do not just tighten it by hand.
Use a pipe wrench to tighten it firmly. This step is important because if the pipe isn’t secure, the entire head sculpture can start twisting while you work.
Once tightened properly, the pipe should feel completely solid.
Step 4: Create the Armature Loops
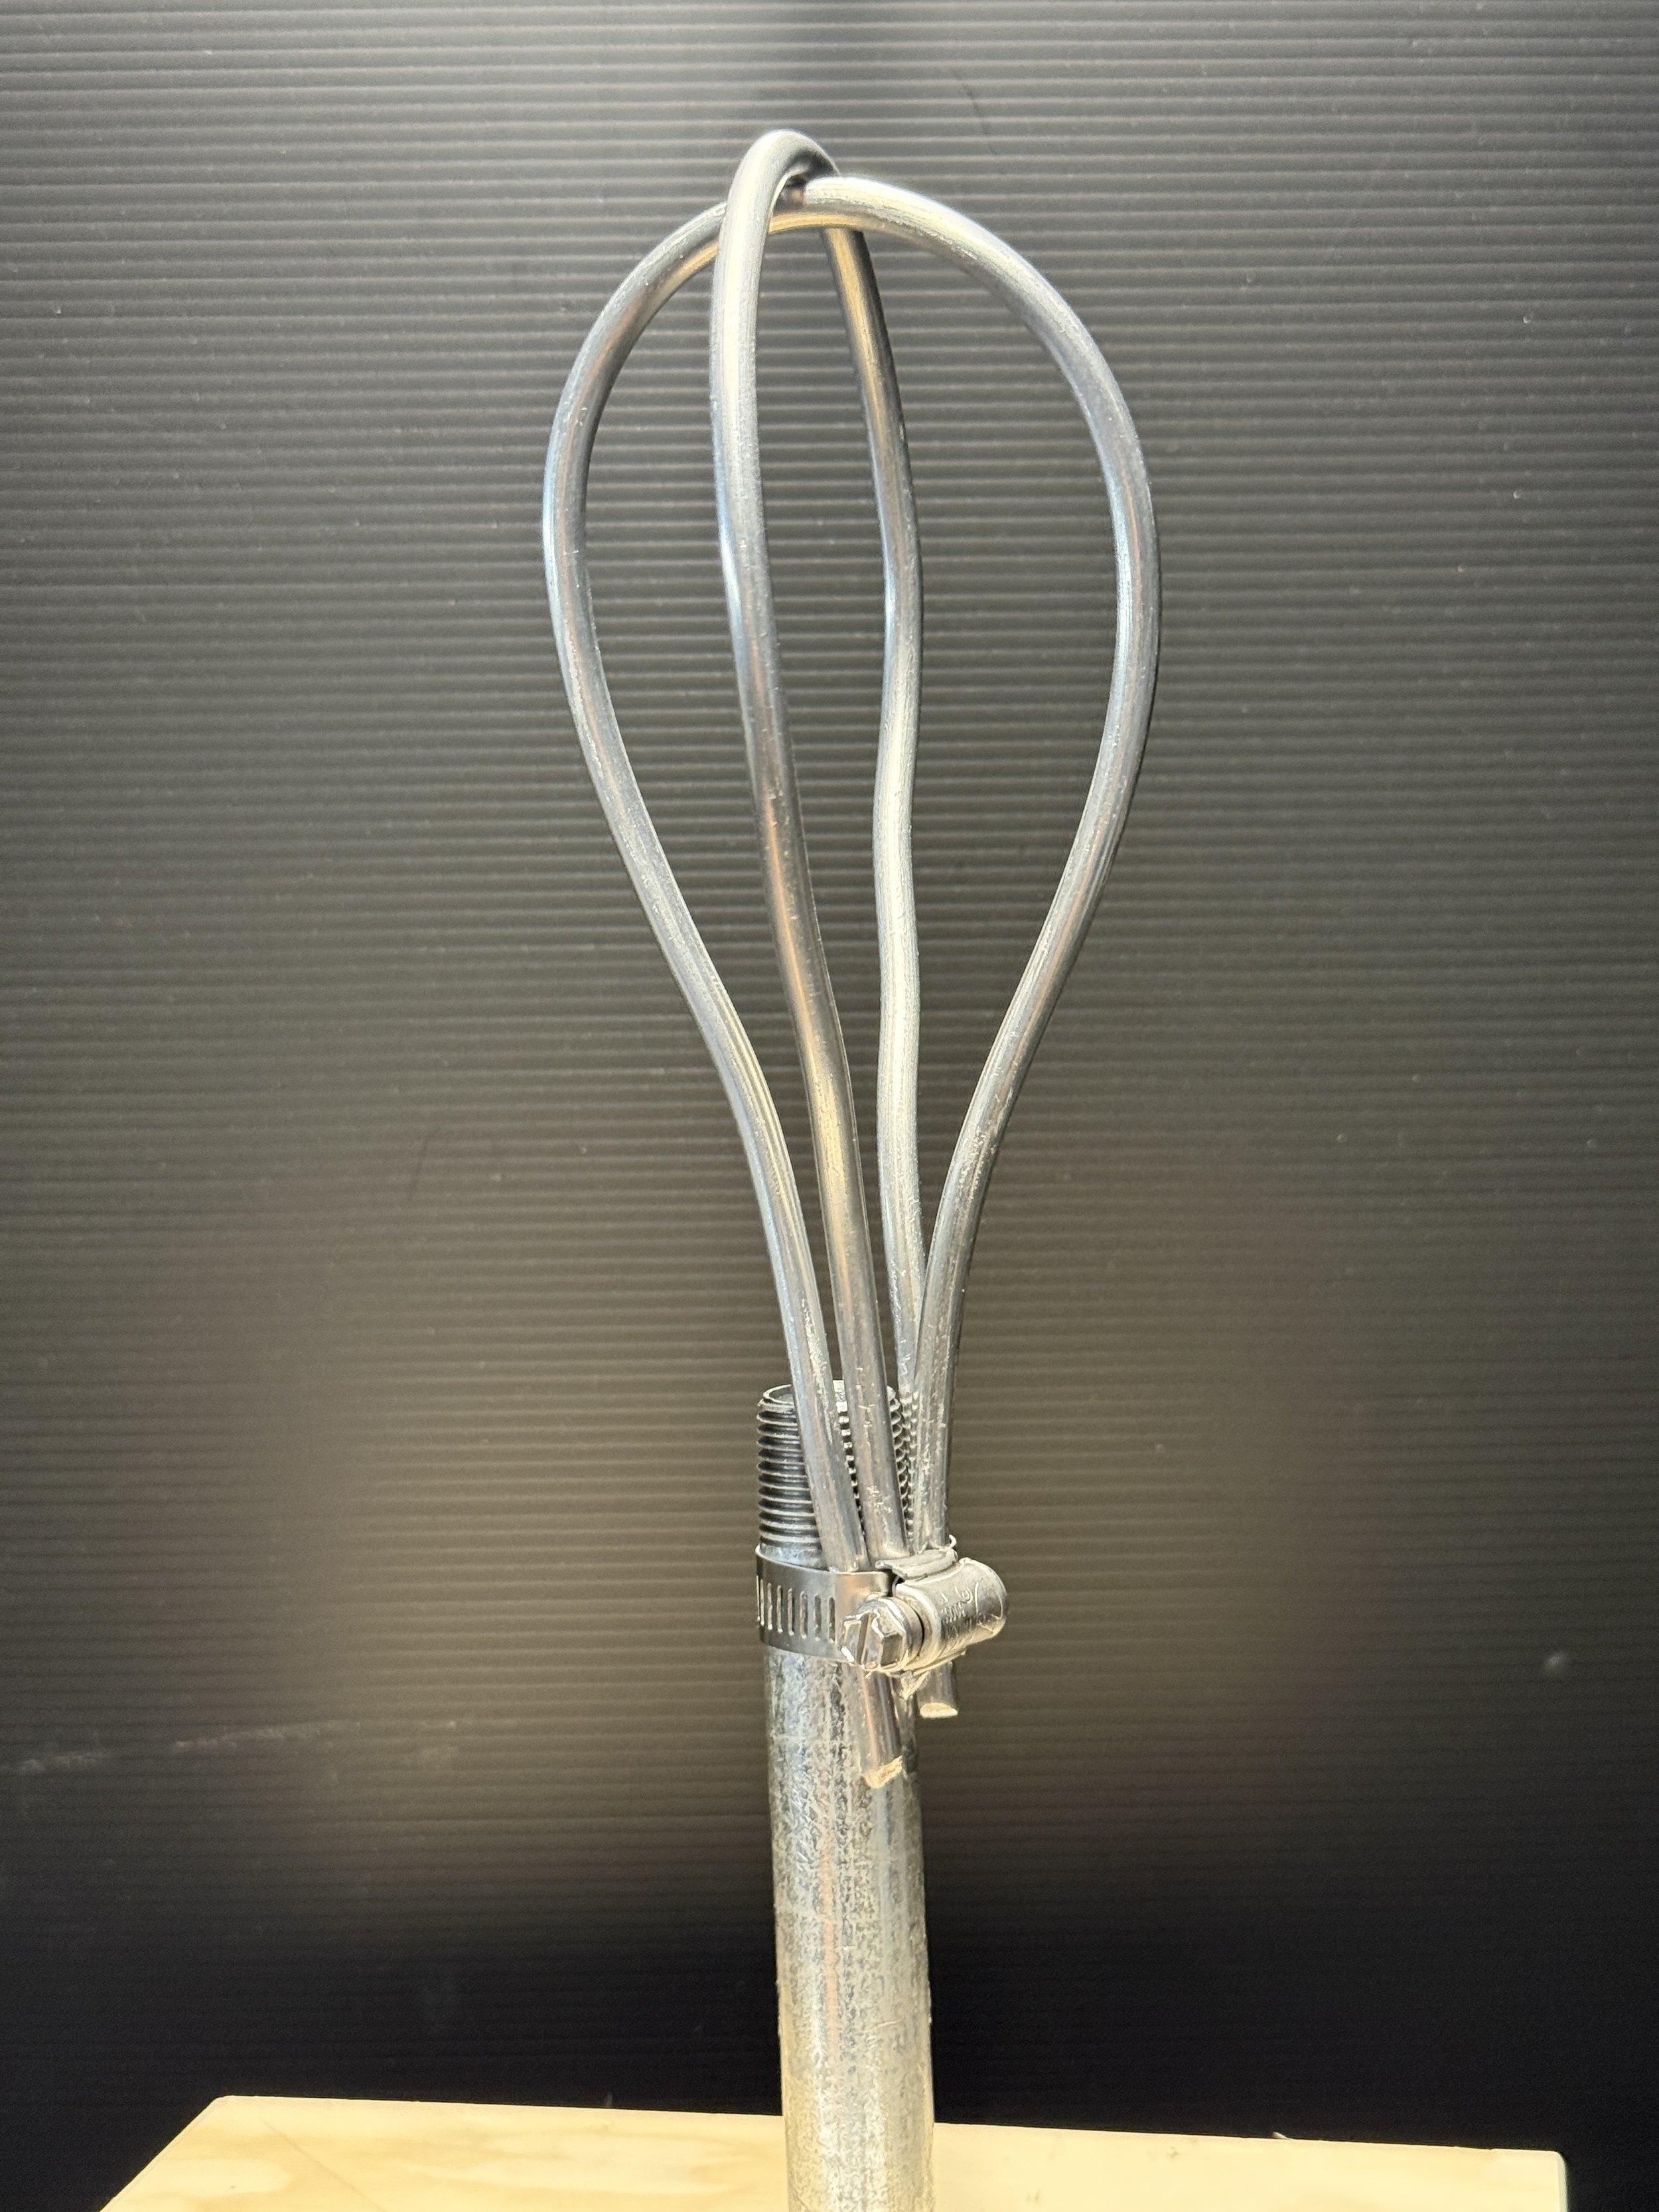
Next, build the wire structure that will support the clay.
Using ¼-inch armature wire, create two loops. For a ¾ scale head, the loops should be roughly the size of your fist.
These loops represent the mass of the head and give the clay something to hold onto.
Leave about 2 inches of wire between the top of the pipe and the beginning of the loops. This small gap allows you to adjust and pose the head slightly while sculpting.
In hindsight, I would recommend making the armature a little longer than you think you need. A longer wire gives you space to add two hose clamps, which makes the structure more adjustable and secure.
Step 5: Secure the Armature to the Pipe
Place the wire armature against the pipe and secure it using hose clamps.
Tighten the clamps until the armature is firmly attached. The structure should feel stable but still allow small adjustments if needed.
If your wire is long enough, two hose clamps provide extra stability.
Step 6: Fill the Structure with Foil

The final step before sculpting is to fill the wire loops with aluminum foil.
Crumple the foil and pack it between the loops to create the rough volume of the head.
This does two things:
Reduces the amount of clay you need
Gives the sculpture a lightweight core
You don’t need to be precise here. Just create a solid mass that roughly represents the size of the head.
Start Sculpting
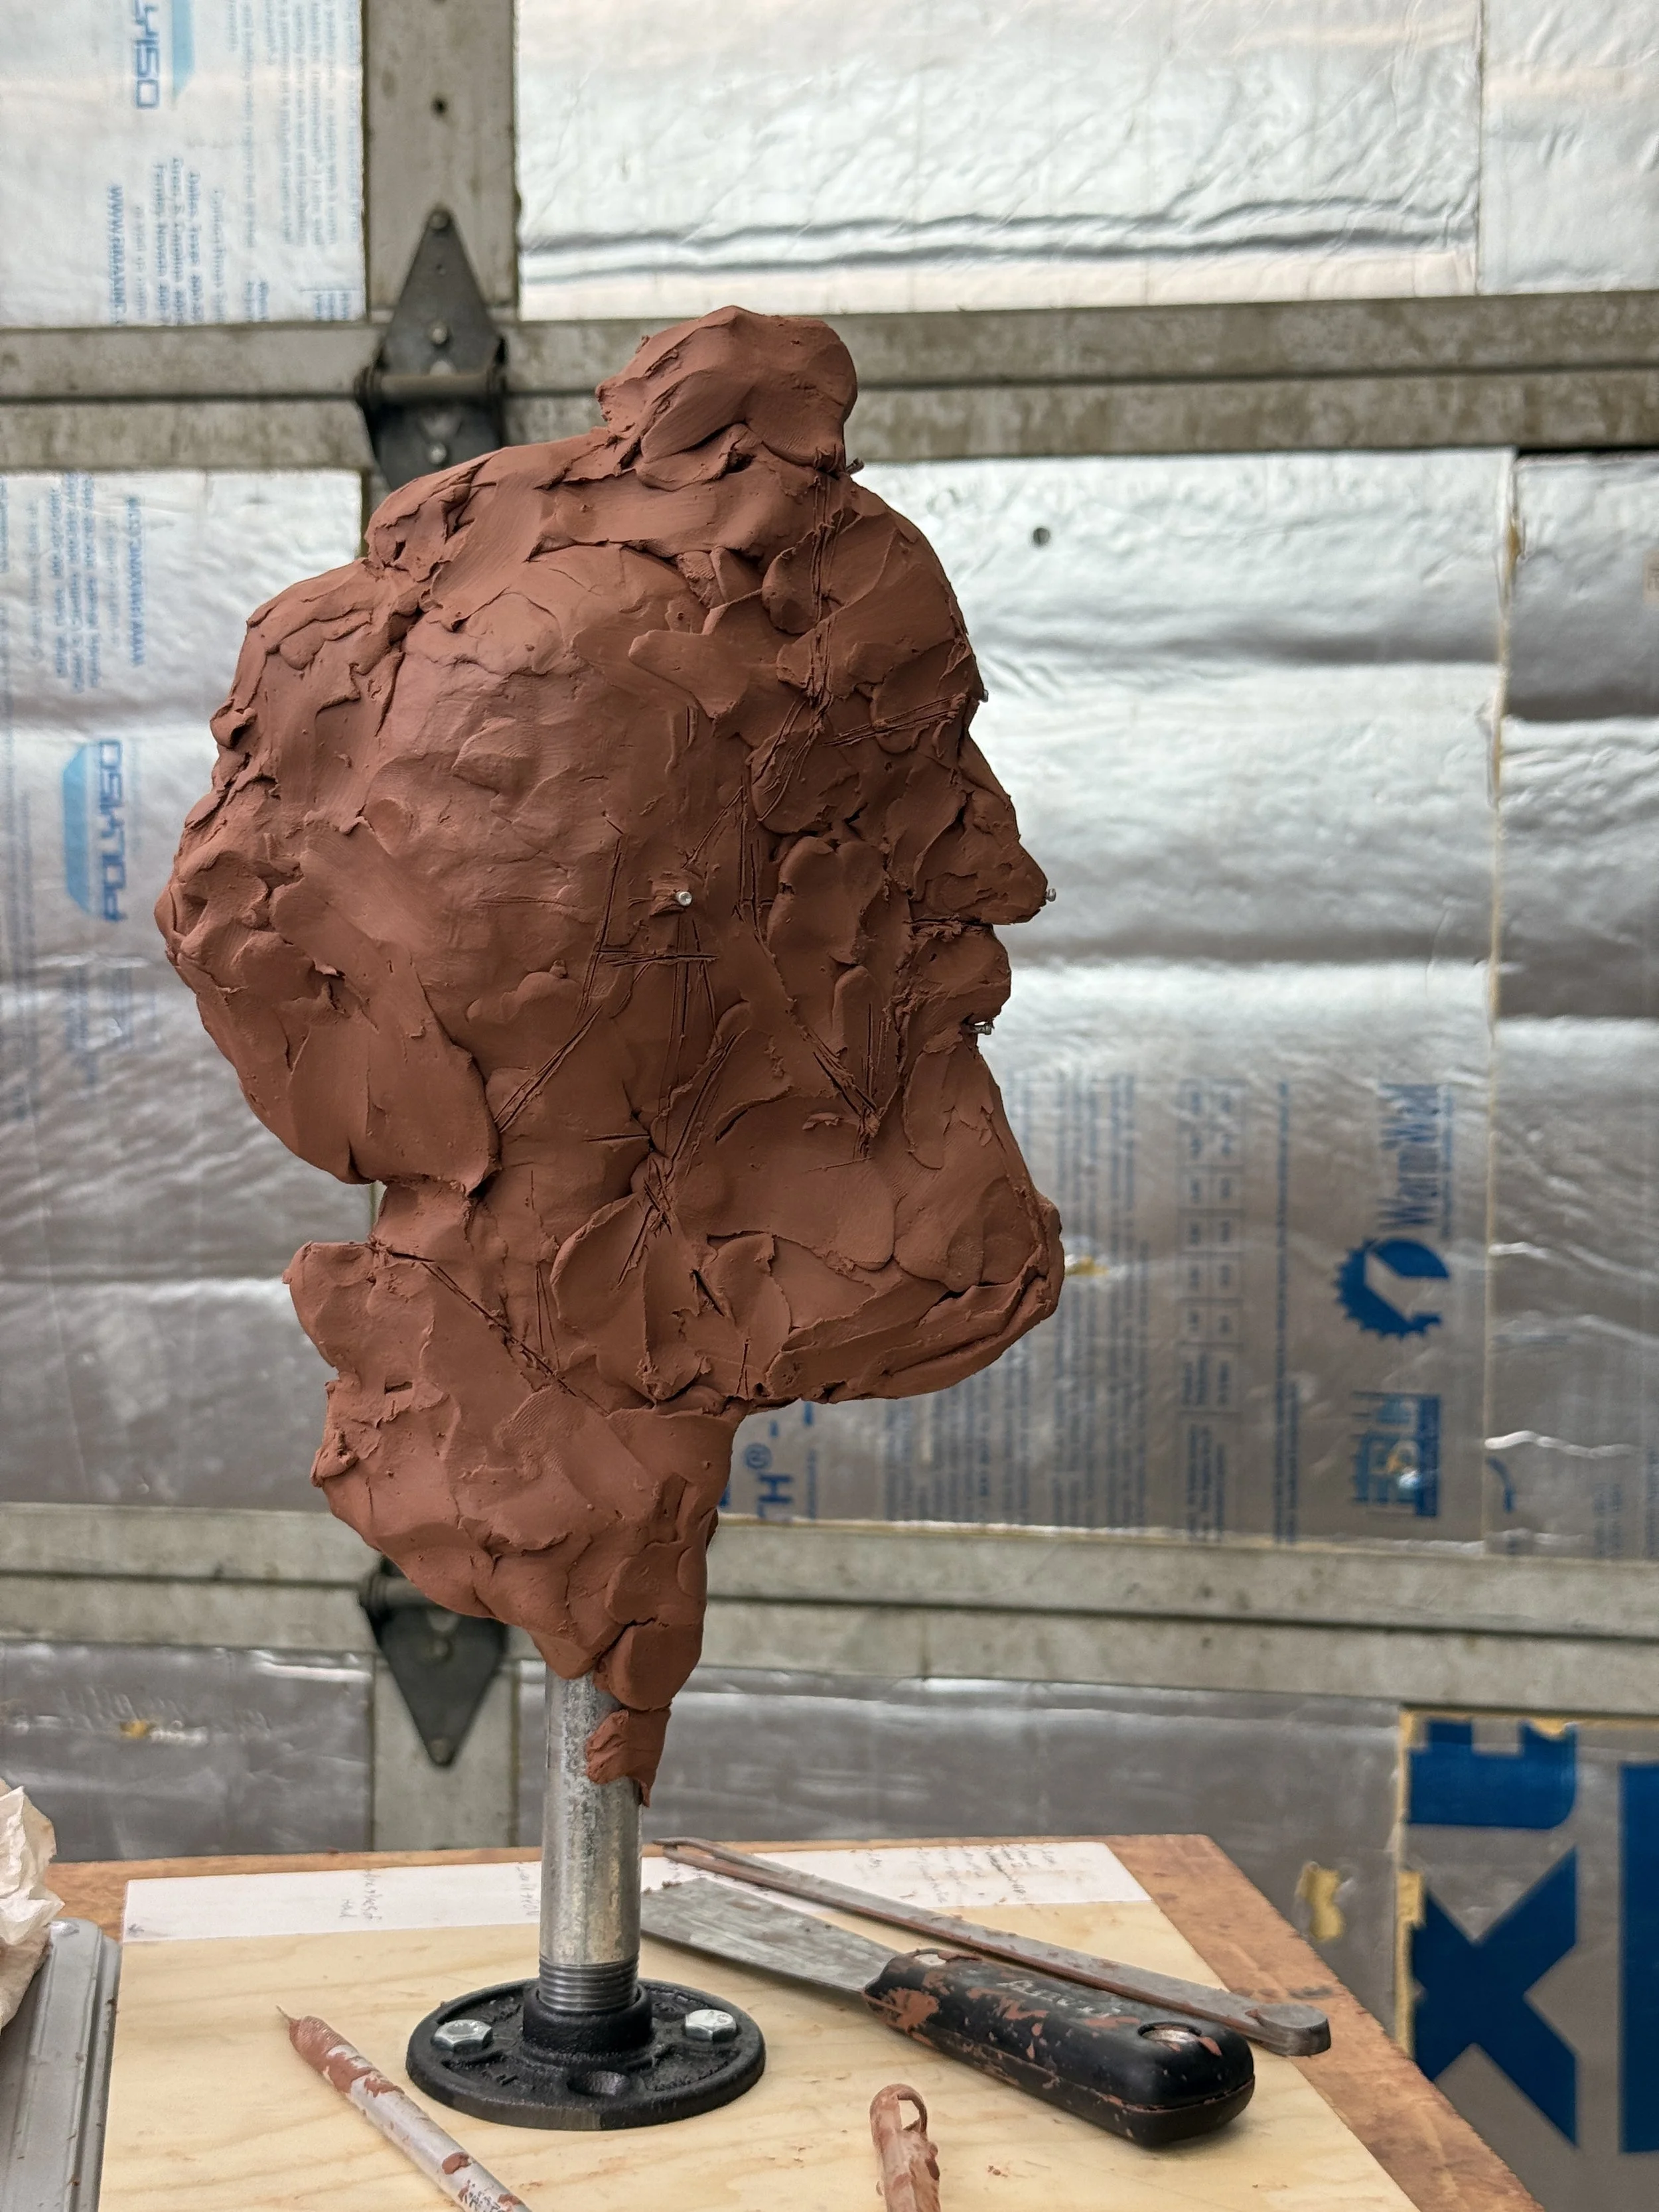
Once the foil is in place, your armature is ready.
Now you can begin applying clay and building your portrait sculpture. Because the structure is strong and stable, you’ll be able to focus entirely on sculpting without worrying about the armature shifting or twisting.
This simple setup works great for ¾ scale busts and even life-size portraits, and it’s easy to modify if you need a slightly different size.
Once you build one, you’ll likely reuse this same armature design for many future sculptures.
After finishing a portrait sculpture, you might want to make a mold so you can cast copies.